Friday, April 29, 2011

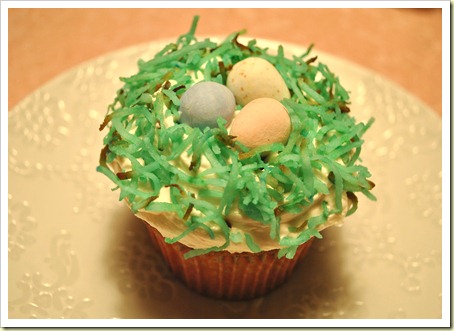
nesting egg cupcakes

DSC_2881

ingredients

cake
1 cup unsalted butter, at room temperature
2 cups sugar (I prefer bakers’s sugar, aka caster sugar)
3 cups sifted unbleached white flour
4 teaspoons baking powder
1/2 teaspoon salt
4 eggs, separated
1 teaspoon good quality vanilla extract
1/2 vanilla bean
1 cup milk

1 – 18 ounce bag (or 72) Cadbury mini eggs (substitute jellybeans,etc…)

DSC_2825

icing
3 cups sifted confectioners sugar
1 tablespoon good quality vanilla extract
1 – 1/2 cups unsalted butter, at room temperature
1/4 teaspoon salt

DSC_2855 

coconut ‘grass’
1 – 1/2 cups sweetened coconut, fancy shred (preferred) or angel flake
green and blue food coloring
water

directions

Preheat oven to 325 degrees Fahrenheit.

cake
Cut the butter into small pieces.  Place in a large bowl and beat with a wooden spoon or electric mixer until very light and fluffy.  Add the sugar and beat again until the mixture is light yellow and fluffy.  Next, add the egg yolks, beating just until combined.  Add the vanilla extract.  With a sharp knife, split the vanilla bean and scrape the seeds into the bowl.  Mix well. 

In two parts, add the flour and milk to the butter mixture.  First stir in about half of the sifted flour.  Pour in about half the milk and gently mix that into the batter.  Stir in the remaining flour and finally, pour in the rest of the milk, gently stirring to incorporate. 

In a metal bowl, beat the egg whites into soft peaks with a whisk or mixer.  Add a spoonful of egg white to the batter, stirring gently to lighten the batter.  Gently fold in the rest of the egg whites, preferably with a large rubber spatula, just until mixed in. 

DSC_2831DSC_2833 DSC_2834DSC_2839

Divide the batter between 24 muffin cups, each about 2/3 full.  Bake for 25-30 minutes or until cakes are very lightly browned and a toothpick comes out clean.  Cool completely on a wire rack.  Frost generously with buttercream frosting and decorate, as desired.
DSC_2840DSC_2843

buttercream frosting
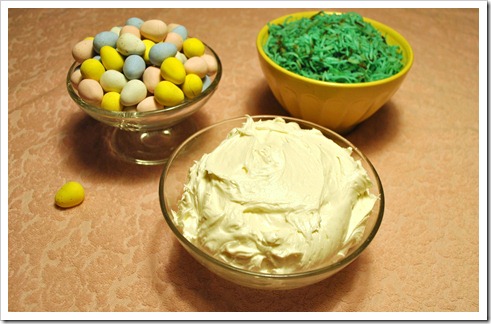
In a large bowl, combine the confectioners’ sugar, butter, vanilla and salt.  Beat at medium speed until smooth, about 5 minutes.

coconut ‘grass’
Place coconut in sealable gallon-size plastic bag.  Set aside.  In a small bowl, mix 3 –4 drops green and 1 – 2 drops blue food coloring with 1 tablespoon water.  Stir to combine.  Sprinkle the food coloring mixture over the coconut, seal the bag and shake to incorporate.  Add more diluted food coloring, as desired. 

Spread the coconut evenly on a foil-lined baking sheet.  Toast on low-broil, stirring every minute or two, until some pieces are lightly browned, 5 – 10 minutes.  Monitor closely to prevent burning.  Cool on foil until needed.
DSC_2864

assembly
When the cupcakes have cooled, frost immdiately using an offset metal spatula or spreader (without a serrated edge).  Place a large dollop in the center of each cupcake, working outward in a circular motion.  Position three chocolate eggs in the center.  Sprinkle the surrounding frosting with toasted coconut.  As a rule, cupcakes are best the same day, but these keep well overnight, once frosted. 

Happy spring, happy baking!


Cake recipe adapted from Alice Waters’ 1-2-3-4 cake recipe, found in ‘Birthday Cakes’ by Katherine Kleinman.
Friday, April 15, 2011

nanaimo bars

DSC_2899_02

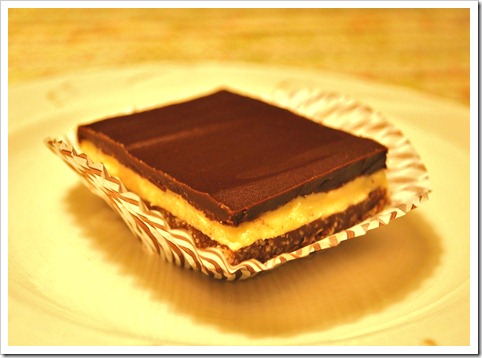
My Nanaimo bars are loosely based on a recipe given to me by a real live Canadian.  Over time, I have tweaked the measurements and ingredients to mimic that famed ferry boat version.  Whether or not it resembles the original is inconsequential as there are far too many versions to pinpoint a top contender.  What I do know is this: everyone who tries these bars loves them.  They speak of them in hushed tones of reverence, request them by name and beg for an encore appearance. 
The secret behind the bars lies in the source of their pale yellow filling, Bird’s custard powder, which comes from the UK and lends the center layer its unique flavor and texture.  It is worth the effort to track down this product, either in a specialty store or online, as the bars are better for it.  In a pinch, vanilla pudding powder is a reasonable substitute.  Even haters of coconut (you know who you are) are fans of Nanaimo bars.  I attribute this to the use of unsweetened coconut shred rather than those cloyingly sweet, soggy flakes with the angelic moniker.  Unsweetened coconut is all about texture with a flavor that is surprisingly understated. 

Though it will strike some as odd, the recipe (which is chilled, not baked) calls for one egg.  That’s right, the crust contains raw egg.  This necessary egg acts as a binding agent, neatly holding the crust together.  I am vigilant in relaying this information to all who partake of the bars, yet this appalling detail has yet to deter a single recipient.  Apparently, we Americans aren’t as uptight as they make us out to be.  Just be sure to keep the bars cool and store them in the refrigerator. 


nanaimo bars

yields about 20 bars


ingredients

base
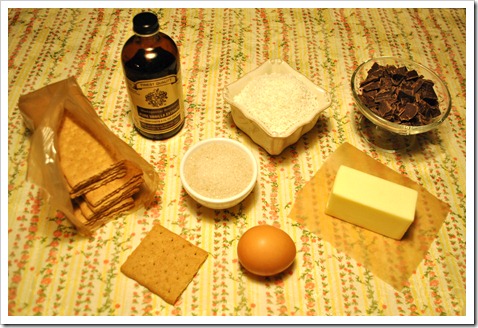
2 ounces semi-sweet chocolate (such as Scharffenberger) 
6 tablespoons unsalted butter
1 cup graham cracker crumbs or about 12 sheets
1 – 1/2 cups unsweetened coconut shred
1 tablespoon sugar
pinch of salt 
1 teaspoon vanilla
1 egg, lightly fork beaten

DSC_2790

filling
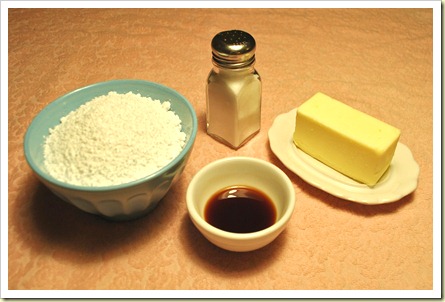
1/4 cup butter, softened
3 tablespoons milk
2 tablespoons Bird’s custard powder (substitute: vanilla pudding mix)
3 cups powdered sugar 
1 tablespoon vanilla extract

DSC_2817

ganache
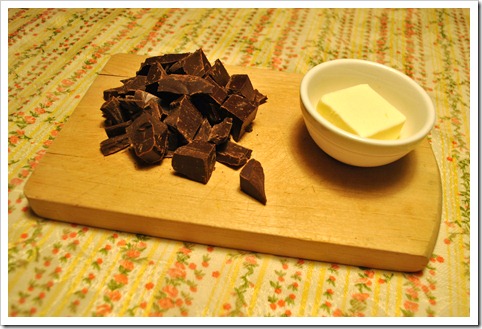
6 ounces semi-sweet chocolate
4 – 6 tablespoons unsalted butter

DSC_2845

directions

base
Melt the chocolate and butter on in a saucepan over low heat.  Alternately, place butter and chocolate in a microwave-safe bowl, stirring at 30-second increments until just melted.  Cool slightly.  In a food processor, pulse the graham crackers until they are reduced to fine crumbs.  Add the coconut and sugar.  Pulse until combined.  Leave the mixture in the bowl of the food processor until needed.

Add the beaten egg to the chocolate mixture, whisking briskly to emulsify.  The egg acts as a binding agent, to hold the base together.  Stir in the vanilla.  In a steady stream, pour the chocolate-egg mixture into bowl of the food processor.  Pulse until combined. 

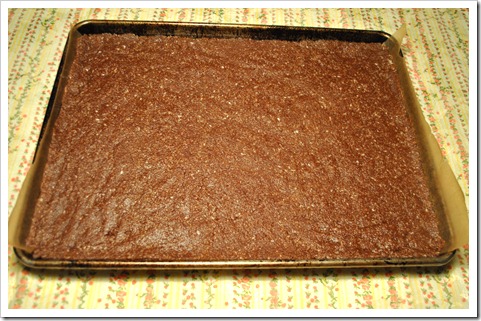
Press the mixture evenly into the bottom of a waxed paper lined 9” x 13” baking dish or rimmed baking sheet.  Chill for about 30 minutes in the refrigerator or freezer.

DSC_2799 

filling
While the base is chills,  use a handheld electric mixer to blend the butter, milk and custard until well combined.  On low speed, add the powdered sugar, raising to medium speed once incorporated.  Add the vanilla.  Beat on medium high, scraping the sides of the bowl, as needed, until the mixture is silky and smooth. 

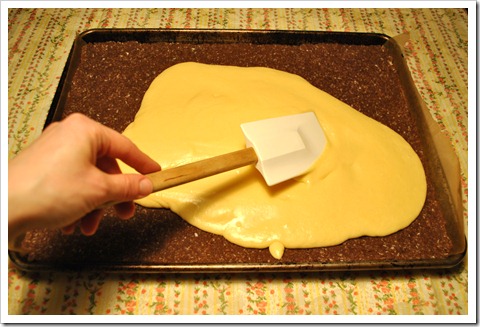
With a large rubber spatula, spread the filling evenly over the chilled base.  Chill for about 30 minutes in the refrigerator or freezer.

DSC_2821

ganache 
The final layer requires proper timing, so be sure to start the ganache once the custard layer is firm.  Place the chocolate and butter in a saucepan over low heat, whisking until melted.  The consistency should be slightly thicker than chocolate syrup.  If the mixture is too thick, add additional butter, as needed.

Pour the melted chocolate mixture over the custard layer and, using a rubber spatula, work quickly to spread the chocolate evenly over the top, extending all the way to the edges of the baking dish.

DSC_2851

Chill for another 20 – 30 minutes in the refrigerator or freezer.  Allow the pan to sit at room temperature for about 5 minutes before cutting into bars.  Using the tip of a sharp knife, carefully cut 2-1/2” x 3” bars.  Remove bars from the pan with a small offset metal spatula.  The first bar is always the hardest to remove.  For best results, serve cool but not fully chilled.  Store in an airtight container in the refrigerator for up to three days. DO NOT store at room temperature due to raw egg in the crust.


For more on the history of Nanaimo bars, plus recipes for both traditional and off-the-wall versions, check out this post by the lovely Jessie Oleson of Cakespy.

Saturday, April 9, 2011

pink cookies

DSC_2781 

This recipe is a slight adaptation of one found in ‘A Homemade Life’ by local author, Molly Wizenberg.  They taste best the second day, after the frosting has had a chance to seep into the top layer of the shortbread-style cookie.  Trust me on this one.  Be warned, they are highly addictive, particularly when chilled.  Their secret weapon is a touch of almond extract in the cream cheese frosting.  Wizenberg’s version calls for kirsch or cherry extract and I imagine it would be just as good but I do love the way the hint of almond flavor plays off of the tangy cream cheese.  Whether you opt for almond or cherry, the flavoring adds that je ne sais quoi and these cookies wouldn’t be the same without it. 

yields approximately 24 cookies


ingredients

cookies
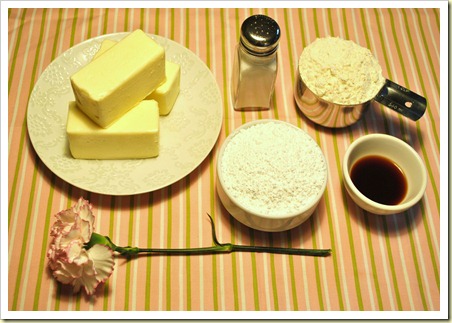
1 – 1/2 cups ( 3 sticks) unsalted butter, at room temperature
1 cup powdered sugar, sifted after measuring
3 cups unbleached white flour
1/2 teaspoon salt, rounded
1 teaspoon vanilla extract

DSC_2732

frosting
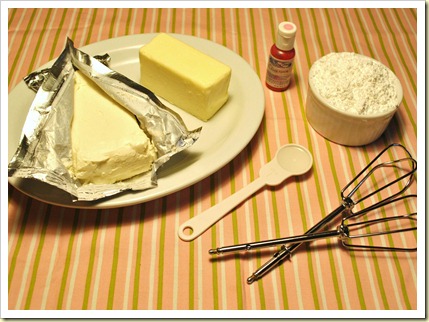
8 ounces cream cheese, at room temperature
6 ounces unsalted butter, at room temperature
3 cups powdered sugar, sifted after measuring
1 teaspoon almond extract
1 pinch salt
a touch of red or pink food coloring

DSC_2741 

directions

cookies
In a medium bowl, use an electric mixer to cream the butter and sugar until light and fluffy.  Add the vanilla and mix well. 

In another medium bowl, whisk together the flour and salt until well combined.  Add the flour mixture to the butter mixture, beating until the flour is incorporated.  

Place the dough on a large piece of plastic wrap.  It should be a bit crumbly but not dry.  Shape the dough into a disc and wrap well.  Refrigerate for 1 hour. 

Preheat oven to 325 degrees Fahrenheit.

On a floured sheet of parchment paper, roll out the dough to just under 1/4” thick.  Cut out either rounds, hearts or flowers, depending on preference.  Really, any shape will do.  Work quickly as the dough is difficult to handle as it softens.  If the dough becomes too soft, wrap it in plastic and return it to the refrigerator for about 15 minutes.

DSC_2754

Place the cookies 1 – 1/2” apart on parchment lined baking sheets.  Bake one sheet at a time for 16 – 20 minutes or until edges are very lightly colored.  Chill the other sheet of cookies in the refrigerator until ready to bake.  Carefully transfer the baked cookies, still on parchment, to a wire rack to cool.

 DSC_2764DSC_2758

frosting
In a medium bowl, beat the cream cheese and butter with an electric mixer on medium speed, until fully combined.  Add the powdered sugar and beat on low speed, until incorporated.  Raise the speed to medium-high and beat until satiny smooth and free of lumps, scraping down the bowl, as needed.  Add almond flavoring and 1 or 2 drops of food coloring.  Add more color as desired.  I prefer a very light pink, reminiscent of a cherry blossom.

DSC_2772

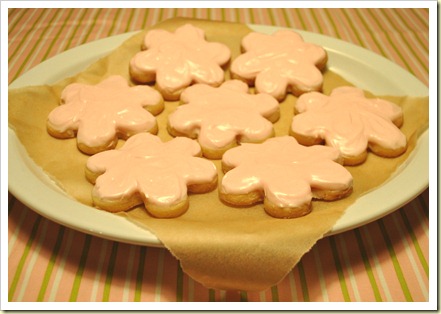
Once the cookies have fully cooled, spread the tops with a generous layer of frosting; the thicker, the better.  Allow the frosting to set for about an hour before storing, to prevent smudging.  The cookies keep for up to three days in the refrigerator or for several months in the freezer. 


Adapted from the recipe for Jimmy’s Pink Cookies in ‘A Homemade Life’ by Molly Wizenberg.

Tuesday, March 29, 2011

‘poisson en papillotte’ or ‘fish in parchment’

DSC_2664

A few years ago, I landed upon a recipe for fish in parchment or ‘poisson en papillotte’ as the French call it.  It was one of those recipes that almost wasn’t, it was so easy.  Though any fish would do, I opted for halibut and knew at once I had rediscovered an old friend. 

Parchment effectively seals in moisture, essentially poaching the fish in its own juices.  The method couldn’t be easier or more versatile and is a whole lot healthier, yet no less flavorful.  My seven year old daughter loves to make her own ‘packet’ and this is easily one of her favorite meals.  Although the recipe below showcases halibut, the same preparation would work for a wide array of fish and vegetable pairings.  

DSC_2635

yields 4 servings
 

ingredients

rice
3 cups short grain brown rice
6 cups water
2 – 1/2 tablespoons unsalted butter
1 – 1/2 teaspoons salt

fish + vegetables
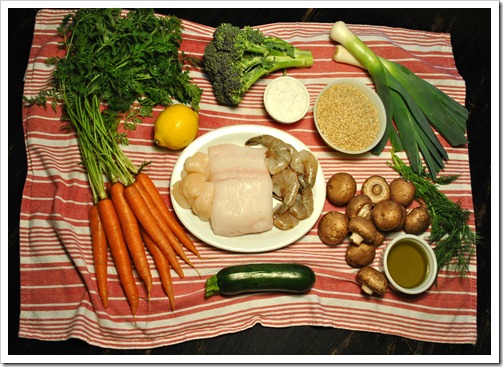
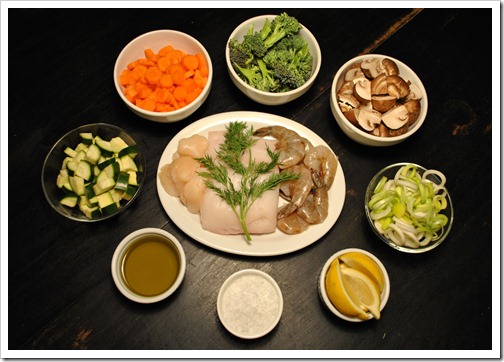
16 ounces fresh halibut, tilapia or salmon, as desired, skin removed
8 medium-sized sea scallops, optional
12 medium-sized wild shrimp or prawns, optional
1 bunch carrots, peeled and sliced in 1/4 inch rounds
2 medium crowns broccoli, florets cut in bite-sized pieces
2 small zucchini, quartered lengthwise and cut in 1/2 inch pieces
12 crimini mushrooms, quartered, stems trimmed
2 –3 leeks, white and pale green parts only, sliced in 1/4 inch rings
1 lemon, cut in 4 wedges 
1 bunch fresh dill

seasoning
2 – 4 tablespoons extra virgin olive oil
crisp white wine such as chardonnay or pinot gris, nothing too fruity
4 tablespoons unsalted butter
coarse sea salt

4 large sheets parchment paper (15 x 20)

DSC_2640
 

directions

Preheat oven to 425 degrees Fahrenheit.

rice
Place water, rice, butter and salt in a medium pot with a lid.  Bring to a boil.  Stir once.  Cover and reduce heat to simmer.  Cook for 40 – 50 minutes.  When water is absorbed, remove from heat and fluff with a fork.  

fish + vegetables
Rinse fish, scallops and shrimp with cold water and pat dry with paper towels.  Divide the fish into four servings.  Set aside.

Place the prepared vegetables in separate bowls.  Be sure to rinse the leeks well to remove all sand and grit. 

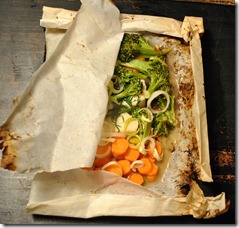
Place a piece of fish, off center, on the right side of the parchment, leaving a 3-inch border to the right.  Surround the fish with two scallops, three prawns and a handful each of carrots, broccoli, zucchini and mushrooms.  Place a sprig of dill over the center.  Scatter leeks over all.  Dot with one tablespoon butter, drizzle with olive oil, add a few splashes of white wine and season with coarse salt.

DSC_2643

Fold one side of the parchment over the fish and vegetables, so that the corners meet.  Fold over the edges several times to seal the packet.  If personalizing the ingredients in each packet, use a sharpie to write initials on one of the folded-over edges. 

 DSC_2654DSC_2657

Place the packets, folded edges up, on a rimmed baking sheet.  Bake for 15 minutes at 425 degrees.  Carefully tear open the packets to retain the fragrant juices inside.  Pour fish and juices directly over a bed of brown rice and serve while hot.

Wednesday, March 16, 2011

chocolate cream pie with malted whipped cream and macadamia brittle

DSC_2426

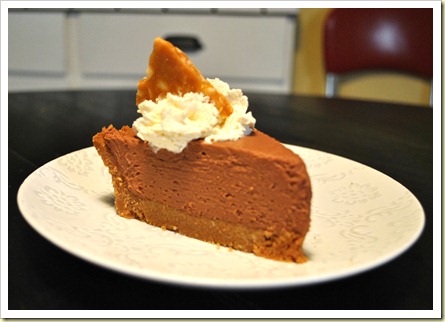
This decadent pie is a close interpretation of one served at Bar Tartine, hands down my favorite San Francisco restaurant.  There’s no denying the pie has a lot going on; yet each component is intrinsic to the final result.  Silky chocolate filling and buttery graham cracker crust mingle with comforting malted whipped cream and the salty sweet crunch of macadamia brittle in harmonious accord.  The recipe requires a measure of advance planning but the steps are well laid out and your efforts will be handsomely rewarded.


Ingredients

crust
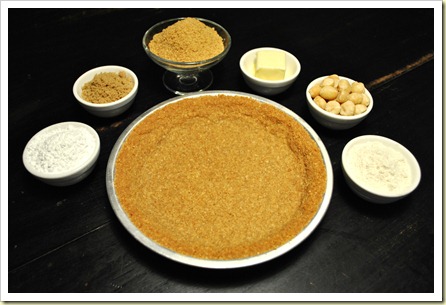
3/4 cup chopped macadamia nuts
1 cup plus 2 tablespoons graham cracker crumbs
2 Tablespoons flour
2 Tablespoons firmly packed dark brown sugar 
1/4 cup (1/2 stick) unsalted butter, melted

DSC_2375

filling
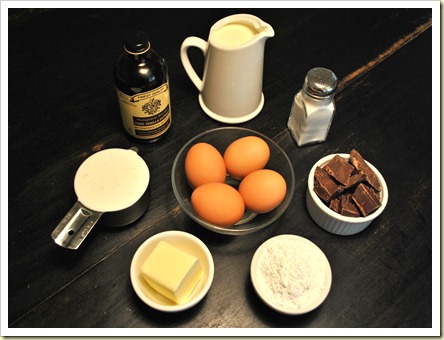
1 cup plus 2 tablespoons sugar
3/4 cup heavy cream + 1-1/3 cup heavy cream
3/4 cup buttermilk
3 1/2 tablespoons cornstarch
Pinch salt
4 egg yolks 
4 ounces semisweet chocolate (such as Scharffen Berger), finely chopped 
1 tablespoon unsalted butter 
1 teaspoon vanilla extract
3 tablespoons confectioners' sugar

DSC_2381

macadamia brittle
1 cup shelled macadamia nuts (salted)
2/3 cup granulated sugar
3 tablespoons cane syrup (lyle’s or steen’s)
3 tablespoons water
1/4 cup unsalted butter, room temperature, plus more for pan
1/2 teaspoon salt
1/4 teaspoon baking soda

DSC_2509

malted whipped cream
1-1/2 cups heavy cream
1- 1/2 tablespoons malt powder
1- 1/2 tablespoons confectioners' sugar


Directions

crust
Preheat oven to 350 degrees.

Brush a 9-inch pie tin with melted butter.

In a food processor, finely grind macadamia nuts with graham-cracker crumbs, flour and sugar.  Blend in butter. Press mixture into bottom and up the sides of prepared pan. Chill in freezer for 10 minutes.  Bake for 8 minutes.  Return to freezer for 10 minutes.  Bake 6-8 minutes longer. Cool crust, 30 minutes.

DSC_2387

filling
In a small saucepan combine sugar, 3/4 cup heavy cream, buttermilk, cornstarch and pinch of salt, and whisk until smooth. Place over medium-high heat, and bring to a boil, whisking from time to time for the sugar and cornstarch to dissolve and the mixture thickens, about 5 minutes. Continue cooking at a low boil for an additional 5 minutes, whisking constantly.

In a mixing bowl, beat the egg yolks lightly. Pour 1/2 cup of the hot mixture into the egg yolks and whisk thoroughly. Pour the egg yolk mixture into the saucepan and whisk over the heat until thoroughly combined and very thick, 1 to 2 minutes. Pour the mixture into a mixing bowl, and whisk in the chocolate, butter and vanilla. Continue whisking until thoroughly combined (mixture will be very thick). Cover the mixture with plastic wrap placed directly on the surface and refrigerate until cooled to room temperature, about 30 minutes.

DSC_2399

Place 1 1/3 cups heavy cream in a chilled mixing bowl and add the confectioners' sugar. Beat until stiff peaks form. Gently fold the whipped cream into the cool chocolate pudding mixture.

 DSC_2403DSC_2405

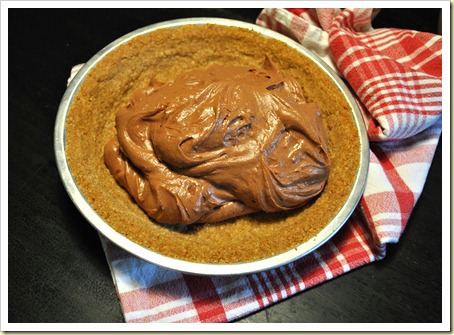
Spoon the chocolate mixture into the prepared pie crust and refrigerate until firm and cool, at least 4 hours for best results.  In a pinch, 2 hours in the freezer should do the trick. When ready to serve, top the pie with malted whipped cream and brittle.  Serve immediately.

DSC_2406

macadamia brittle
Preheat oven to 350 degrees Fahrenheit.

Spread the nuts on a baking tray lined with parchment and toast them in the oven until light golden, 4-6 minutes, turning the nuts after 3 minutes so they toast evenly.  Remove nuts from the pan and cool to room temperature. Coarsely chop the nuts and set aside.

Put the sugar in a medium saucepan. Add the cane syrup and water.  Stir to mix and bring to a boil over medium high heat. Continue boiling, undisturbed, until a layer of bubbles forms on top, 3 to 4 minutes. Cover the pan with aluminum foil and continue to boil undisturbed for 5 minutes longer. Place a wooden spoon on top of the foil to keep down.

Remove the foil and add the butter.  Gently stir with a wooden spoon a few times. When the butter has combined with the sugar mixture and forms a soft boil, add your candy thermometer.  Continue cooking over medium heat, stirring occasionally, until a candy thermometer inserted into the mixture registers 300 degrees, about 8-10 minutes (depending on your cookware). Meanwhile, grease a 9 x 12 inch sheet pan with butter or nonstick cooking spray.

When the sugar mixture reaches the desired temperature, immediately but carefully stir in the salt, baking soda and chopped macadamia nuts. Using a long metal spatula, spread the nut mixture as thinly and evenly as possible over the prepared pan. Leave the brittle to cool to room temperature. The brittle will harden very quickly.

When the brittle is completely cooled and hardened, run a clean, dry towel over the brittle's surface to absorb some of the oil, if needed. Carefully cut or tap the brittle with a mallet to break it into irregular pieces. Store in one or more airtight containers at cool room temperature.

malted whipped cream
Place the heavy cream in a chilled bowl, add the malt and confectioners' sugar.  Beat until stiff peaks form.  Cover and chill until needed.

assembly
Spoon malted whipped cream into a pastry bag or plastic bag with one corner snipped off.  Pipe poufs of whipped cream on each slice of pie.  Garnish with shards of macadamia brittle.  Serve.

  DSC_2427

Chocolate filling adapted from Emeril Lagasse.  Macadamia brittle from Food.com.  Crust adapted from ‘Baked: New Frontiers in Baking’ by Matt Lewis and Renato Poliafito.

Thursday, March 3, 2011

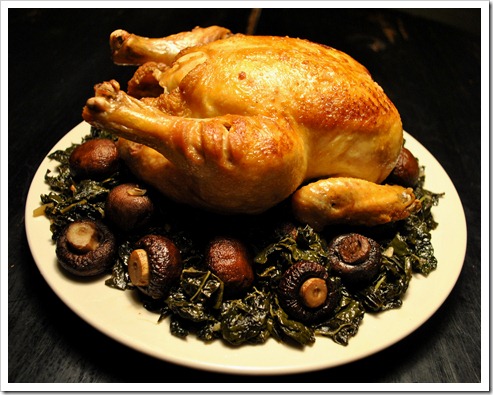
no frills roast chicken with mushrooms and greens

DSC_1635

serves 4

ingredients

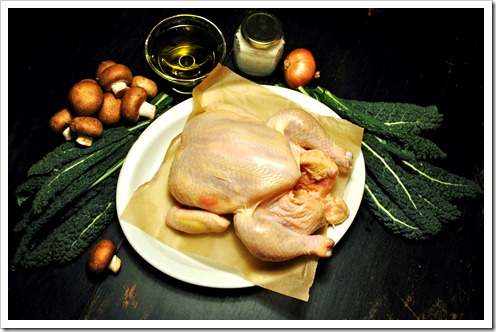
1 – 3 pound free-range whole chicken 
olive oil
coarse sea salt (such as Maldon or fleur de sel)
freshly ground black pepper
20 – 25 whole crimini mushrooms, stems trimmed but not removed
1 large shallot, finely diced
4 bunches dinosaur or lacinato kale, ribs removed, torn in 1” x 3” strips
apple cider vinegar

DSC_1586 

directions

Preheat oven to 450 degrees Fahrenheit. 

Rinse the chicken in cold water and remove any giblets from the cavity.  Pat dry with paper towels, inside and out.  Trim fat around the neck, as needed.  Using your fingers, reach under the skin covering the breast and create two pockets between the skin and meat on either side of the connective tissue separating the breasts.  With a sharp knife, make a few slashes in each of the legs.  Drizzle approximately 1 tablespoon olive oil in the pockets of skin covering the breast meat.  Sprinkle some sea salt in there, as well.  Rub additional olive oil (about 2 tablespoons) on the rest of the bird and in the cavity.  Rub generously all over with sea salt and a touch of ground black pepper, lightly massaging the salt and pepper into the meat.  Truss the bird, if desired.  I find trussing a tad fussy and generally omit this step.

Heat 1 tablespoon olive oil in a Dutch oven or roasting pan, on medium high heat.  Once the oil is near smoking hot, place the chicken breast side down in the pan.  Sear for 3 – 5  minutes.  Brown each wing side by propping the bird against the walls of the pan for 3 minutes per side.  Roast uncovered, breast side up for 30 minutes.  Reduce heat to 425 degrees Fahrenheit and continue roasting.

While the chicken is in the oven, place the mushrooms on a dry towel and rub gently with the edges of the towel to remove any dirt or debris.  Next, arrange them evenly on a parchment lined baking sheet.  Drizzle with 1 – 1/2 tablespoons olive oil and season with coarse sea salt.  Toss to coat.  Place the pan on the rack below the chicken for 25 – 30 minutes, until mushrooms have reached a deep brown and are no longer seeping juices.  Remove from oven, cover loosely with foil and set aside. 

DSC_1599DSC_1611

About 10 minutes before the chicken has finished cooking, remove the pan from the oven.  Using tongs, carefully place the chicken on a large dinner plate.  Cover with foil and set aside.  Place the roasting pan on a burner on high heat.  Add the chopped shallot to the pan, stirring until the shallots are soft and beginning to color.  Add the greens in batches, as space permits.  Stir in a splash of cider vinegar.  Season with salt to taste. 

Place the chicken back in the roasting pan right atop the braised greens.  Pour in any juices accumulated on the plate.  Scatter the roasted mushrooms around the bird.  Return to the oven and continue roasting for 10 –15 additional minutes.  Cooking time depends on the size of the bird, although the general rule of thumb is 20 minutes per pound.

To serve, place the chicken on a large platter over a bed of braised greens and mushrooms.  Serve with simply roasted fingerling potatoes and whole wheat buttermilk biscuits

DSC_1660 - Copy

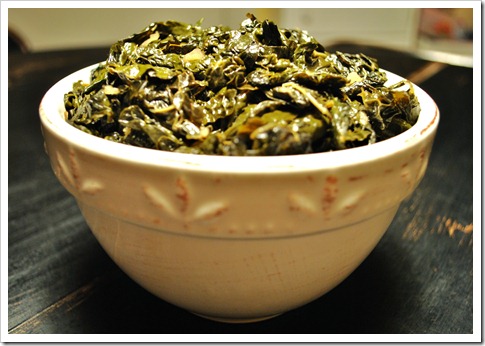
pan braised greens with shallots

DSC_1604 

serves 4 – 6

ingredients

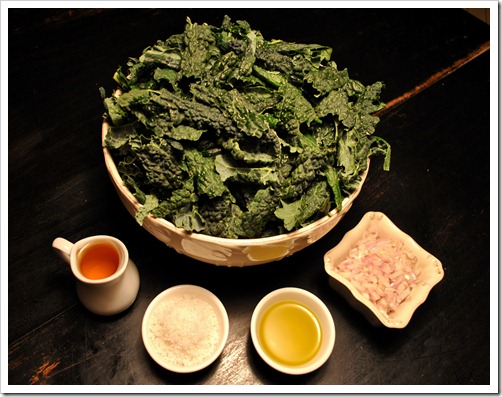
4 bunches greens (such as dinosaur kale, chard or collard or a mixture)
1 large shallot, finely diced
1 –2 tablespoons olive oil
1 tablespoon apple cider vinegar
aleppo pepper, optional
sea salt
water

DSC_1609


directions

Wash the greens well, being sure to carefully check for bugs and dirt.  Remove the center stalk and ribs.  Tear the greens into small strips, about one by three inches.  Rinse once more.  Place greens in a large bowl and set aside. 

In a large pan with high sides, heat 1 tablespoon olive oil on medium high heat.  Add the shallots, stirring until they are translucent and the edges are crispy brown.  Fill the pan with greens.  Stir well to mix in the shallots.  Once the first batch of greens have shrunk down, incorporate any remaining greens.  Add the vinegar and another tablespoon of olive oil.  Season with sea salt, to taste.  Add about 1/4 cup water and continue cooking for 3 –5 minutes on medium heat.  For a spicy kick, I sometimes add a pinch or two of Aleppo pepper but any chili pepper flakes will do.

Serve hot.  These are an excellent accompaniment alongside roast chicken or steak.

DSC_1677

the very best whole wheat buttermilk biscuits

DSC_1715 

yields 10 biscuits


ingredients

1 – 1/2 cups whole wheat pastry flour
1/2 cup unbleached white flour
1 tablespoon + 1/4 teaspoon baking powder
2 teaspoons sugar
1/2 teaspoon cream of tartar
1/4 teaspoon baking soda
1/2 teaspoon salt
1/2 cup cold butter, cut in 1/4” pieces
3/4 cup buttermilk

DSC_1722


directions

Preheat oven to 450 degrees Fahrenheit.

In a medium bowl, whisk together all dry ingredients.  Using a pastry cutter or two knives, cut cold butter into the mixture until it resembles pea-sized coarse crumbs.  It is imperative that the butter is cold and that the pieces of butter are visible.  These pieces create pockets of air during baking, resulting in lighter, flakier biscuits.

DSC_1629

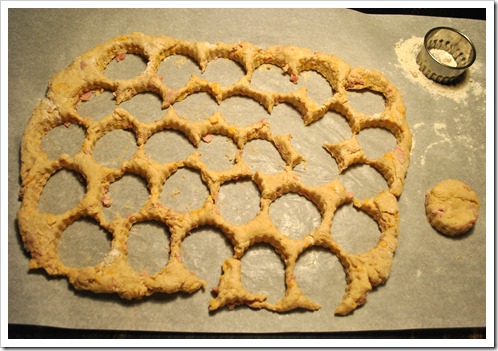
Make a well in the center of the mixture.  Pour in the buttermilk, stirring with a large fork until it just clings together.  Do not over mix.  Dump the dough onto a flour surface.  With floured hands, gently pat and press the dough together.  Roll or pat the the dough to one inch thick.  Cut with a biscuit cutter or a glass that is 2 1/2” inches in diameter. 

DSC_1725

Place biscuits one inch apart on a parchment lined baking sheet.  For more rustic biscuits, place the cutouts close together in a nine inch cake pan.  This may increase baking time slightly.

DSC_1708

Bake for 12 – 15 minutes, checking at 10 minutes to determine progress.  Tops will be light golden brown when the biscuits are ready.  I like to pull one biscuit apart to be sure it’s no longer doughy in the center.  Serve hot with plenty of butter and honey.


whole wheat ham and cheddar biscuits

DSC_1729

These are a huge hit with children and adults, alike.  Simply fold in 3 ounces chopped ham and 3 ounces chopped cheddar cheese before adding the buttermilk.  Increase buttermilk to one cup.  Additional flour may be needed when patting or rolling out the dough.  Be careful not to overwork the dough or your biscuits will be tough.  Cut into 2 - 1/2 inch rounds and bake at 450 degrees Fahrenheit for 10-12 minutes.  These tend to bake faster than the regular biscuits. 

Serve with fruit for a light lunch or hearty snack.